If your membership includes printing or you purchased printing credits, you have already received an invitation email from Ezeep. The password has been set, and you can print it using the Web Portal. If you did not do this step yet, please refer to this article.
You can also add Ezeep as a printer and print directly to all office printers from your Mac computers.
To start printing with ezeep Blue from your iMac or MacBook, you will need to download, install, and configure the ezeep print app on your Mac. Below you will find the installation and configuration steps for macOS.
Download #
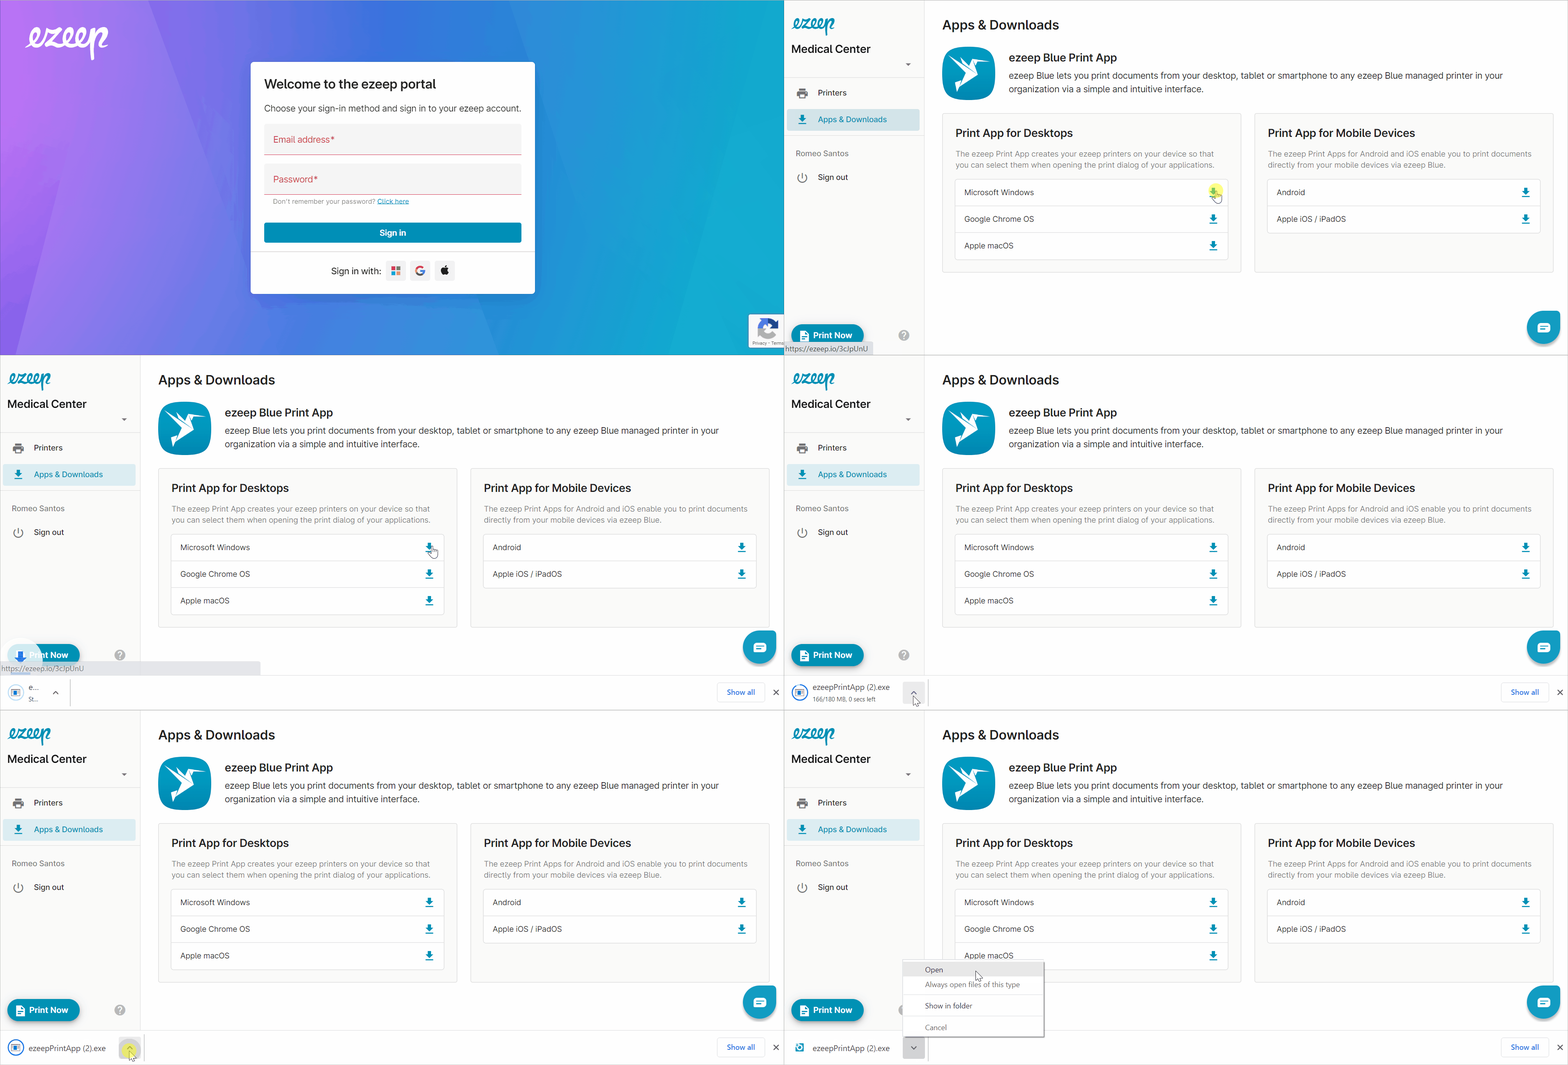
- Login to the ezeep Blue Portal
- On the left pane, select “Apps & Downloads.“
- Under “Print App for Desktops,” click the download arrow on “Apple MacOS.” The software will download to the “Downloads” folder.

Install #
- Look for the zip file in the downloads folder
- Extract the zip file
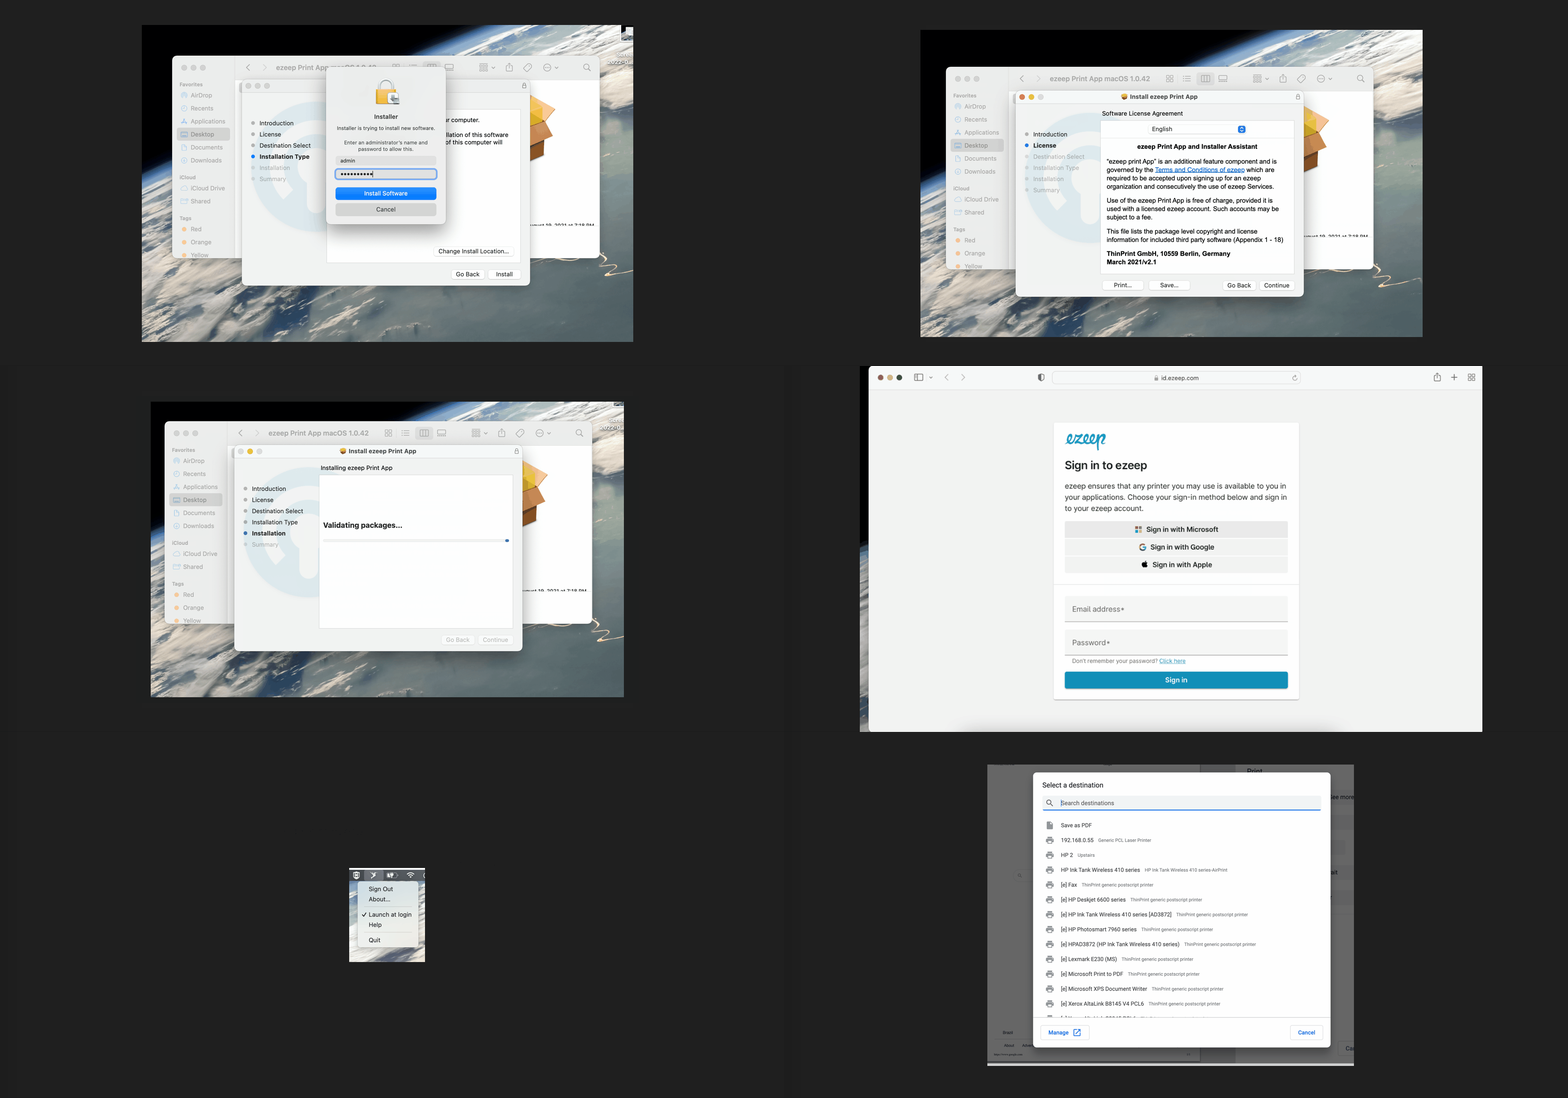
- Run the .pkg
- Enter admin credentials when prompted
- Wait for the installer to finish
- Enter your ezeep credentials when prompted
- Now, when you go to print from an application, you will see your ezeep printers listed with [e] in front of the name
- You are ready to start printing!

Uninstall #
- Locate the app in the “Finder.”. Most apps can be found in your Applications folder, which you can open by clicking Applications in the sidebar of any Finder window. Or use Spotlight to find the app, then press and hold the Command (⌘) key while double-clicking the app in Spotlight.
- Drag the app to the Bin, or select the app and choose “File” > “Move to Bin.”.
- If you’re asked for a username and password, enter the username and password for an administrator account on your Mac. This is probably the username and password you use to log in to your Mac.
- To delete the app, choose “Finder” > “Empty Bin.”.


